Move Docker root directory

To avoid the system drive being filled up as the volumes grow I like to move my docker root directory to a dedicated volume. In this example a new drive is added to my docker server which is mounted as /vol/01/ so make sure you have your destination directory setup and change /vol/01 respectively.

First stop Docker and move its defaults directory (/var/lib/docker) to its new home (/vol/01 in this case):

sudo systemctl stop docker && sudo systemctl stop docker.socket
sudo mv /var/lib/docker /vol/01/

Edit (or create) the file /etc/docker/daemon.json and add:

{
"data-root": "/vol/01/docker"
}

If you have existing Docker instances you will need to edit their config.v2.json files:

sed -i 's%/var/lib/docker%/vol/01/docker%g' /vol/01/docker/containers/*/config.v2.json

Now restart docker and your containers should be running at its new location:

sudo systemctl start docker

You can check if the root directory is moved using the docker info command:


# docker info | grep -i root
 Docker Root Dir: /vol/01/docker
Category: linux | LEAVE A COMMENT

Debian 10 add rc.local

On the latest debian version the /etc/rc.local file is deprecated, but we can add it back using systemd for those scripts or applications that still depend on it.

Note that this is not the correct way of doing it, and you should probably create a service for your script or application, but if you don’t want to spend the time just yet to migrate everything over you can simple add the rc.local file back into Debian 10.

First we need to create a service file:

1
2
3
4
5
6
7
8
9
10
11
12
13
14
15
16
cat /etc/systemd/system/rc-local.service
[Unit]
Description=/etc/rc.local
ConditionPathExists=/etc/rc.local
 
[Service]
Type=forking
ExecStart=/etc/rc.local start
TimeoutSec=0
StandardOutput=tty
RemainAfterExit=yes
SysVStartPriority=99
 
[Install]
WantedBy=multi-user.target
EOF

Then we create the rc.local file again

1
2
3
4
5
6
7
8
9
10
11
12
13
14
15
cat /etc/rc.local
#!/bin/sh -e
#
# rc.local
#
# This script is executed at the end of each multiuser runlevel.
# Make sure that the script will "exit 0" on success or any other
# value on error.
#
# In order to enable or disable this script just change the execution
# bits.
#
# By default this script does nothing.
 
exit 0

Set the permissions:

1
chmod +x /etc/rc.local

And enable the service to start during boot

1
systemctl enable rc-local

And finaly start the service

1
systemctl start rc-local

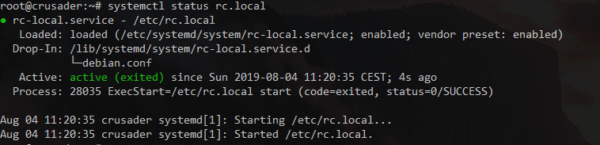
You can view the status of the service with:
And enable the service to start during boot

1
systemctl status rc-local

You can now add what you want back into the rc.local file, of course this is not the ‘correct’ way of doing, best would be to add a service for your scripts/programs in systemd where possible.

Ubuntu 16.04 on HP Spectre 13-v000nd

spectre-v000nd

As the HP Spectre 13-v000nd laptop is still fairly new I was surprised that Ubuntu Linux installed without any mayor issues, all hardware seems to work just fine straight from a clean install without any custom modifications to settings, drivers or modules.

The track-pad is fairly sketchy with random movements when you try to click on something, but it has the same behavior on windows (although it is a bit less than under Ubuntu) and has been mentioned in a number of reviews of the HP Spectre as an common issue. If you however only use a ‘touch’ press instead of a full click the issue seems to be gone, so this might be an issue that will be fixed by HP in a firmware upgrade sometime soon.

After a few hours I already got used to ‘touch pressing’ and as I mainly use an Bluetooth mouse the track-pad issue won’t bother me that much.

The following items all work just fine straight after install:

  • Sound
  • Wireless
  • Bluetooth
  • USB-C Gbit Ethernet (Adapter from StarTech)
  • Brightness Control
  • Function Keys
  • Standby/sleep
  • Keyboard Backlight


The following items work but have some issues:

  • Trackpad (random movements at mouse clicks, same behavior in windows)

Battery live is about 5,5 hours while actively using the machine and with screen brightness at about 90%, which is not to bad as my first test on windows was about 6 hours.

Installation Notes:

To install there are just a few steps to follow:
1) Create a Ubuntu 16.04 USB stick.
2) Disable secure boot in the BIOS. (Press F10 while booting)
3) Enable legacy support mode in the BIOS (system -> boot options).
4) Plug the USB stick in the most right USB-C port (The single one with USB icon, other ports won’t work)
5) Boot from the USB stick (Press F9 while booting)
6) Install..
7) Install tlp (apt-get install tlp)
8) Enjoy..