Rate Tutorial
There are multiple options and methods of how to do multicolor alphas. So read all of them to learn making multicolor alpha bracelets. Good Luck.
Substituting vertical strings
This technique is a simplest way of doing multicolor alpha patterns. The only thing you need to do is use more than one color in the back strings. So when arranging your back strings replace a few of them with different colors.

Pattern
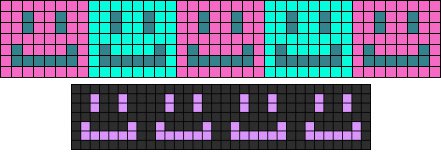
This is the pattern we're going to be working from in this tutorial. You can find it on braceletbook as pattern #223.
Starting
Choose three colors. Two for your back strings, and one for your background. First four strings are going to be the color of the mushroom stem, and the head of the mushroom is going to be the color of your seven other strings. Put them in this order : light orange (background string), four gray strings (mushroom stem color) and seven pink strings (mushroom head color).
Row 1
Make your first row my knotting 11 forward knots with your background color.

Row 2
In the second row, make three orange backward knots, four pink forward knots, and four orange backward knots. You can see that this substitution method is as easy as the two color alpha.
Row 3
Now make four orange forward knots, one pink backward knot, two orange forward knots, two pink backward knots and two orange forward knots.
Row 4
Now make one orange backward knot, six pink forward knots, three gray forward knots and one orange backward knot.
Row 5
In this row make one orange forward knot, three gray backward knots, six pink backward knots and one orange forward knot.
Row 6
In this row make one orange backward knot, six pink forward knots, three gray forward knots and one orange backward knot.
Row 7
Now make four orange forward knots, five pink backward knots and two orange forward knots.
Row 8
Now make three orange backward knots, four pink forward knots and four orange backward knots.
Row 9
This is the last row in this pattern, make the whole row with orange knots and then repeat the pattern until the bracelet is long enough.
FInished Bracelet
This is how the bracelet should look once it's finished. Well done.

Substituting a string during tying
This is the pattern I'm going to be working from in this tutorial. You can find it under pattern #564. You should all know by now how to do two color alpha bracelets, if not, please read that tutorial first. This is a normal 3 colored alpha pattern and I'm going to be using the substitution during tying method. Your first string substitution is always going to look a little messy, so don't worry about that.
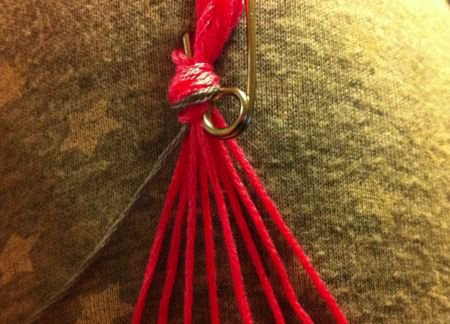
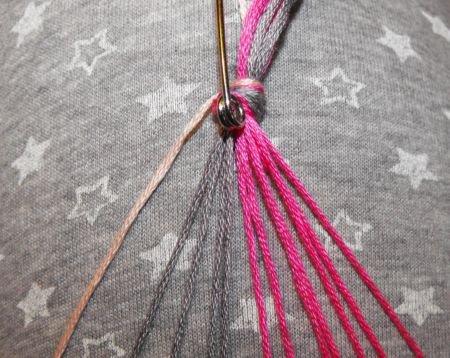
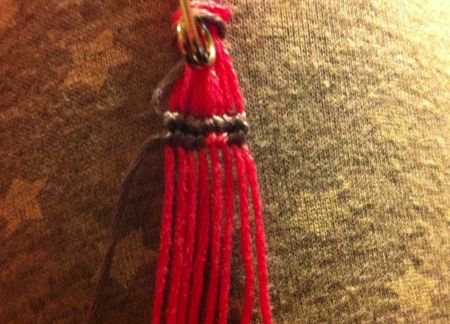
Step 1
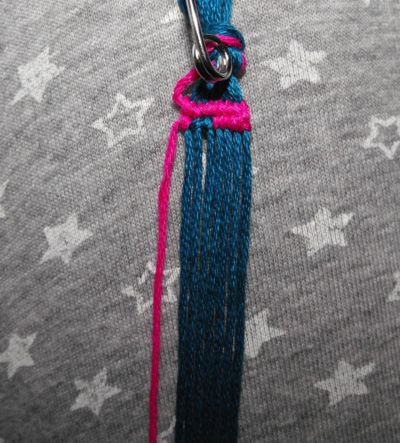
Lay your string as if you were going to do a simple two color alpha. In this case, gray is my background color, pink is my foreground color and red is my substituted string. You can always change this as you'd like, e.g. use the red as your foreground and substitute the pink string. I find it easier this way. So, you've got 8 pink strings, and one long gray string.
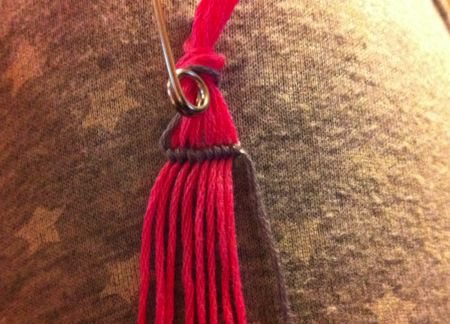
Step 2
Now make your first gray row as you would with simple two color alpha bracelet. At this point, we only have a two colored bracelet.
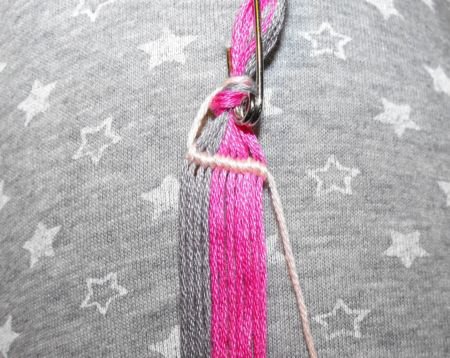
Step 3
In the second row, make two grey backward knots, two pink forward knots, and four grey backward knots. You should know that from two color alpha tutorial.
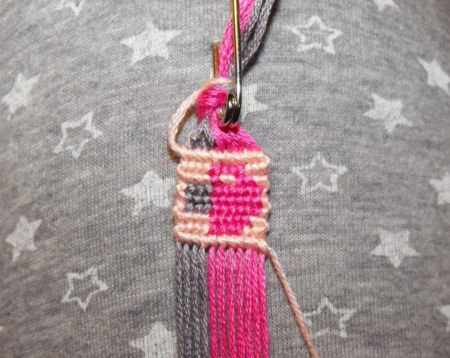
Step 4
In the third row, make three gray forward knots, and one pink backward knot. Now we got to the stage where we need to substitute the red string into our bracelet. I usually tie my to my safety pin, which I'm using to hold my bracelet on my knee. You can tie it anywhere depending on what you're working with.
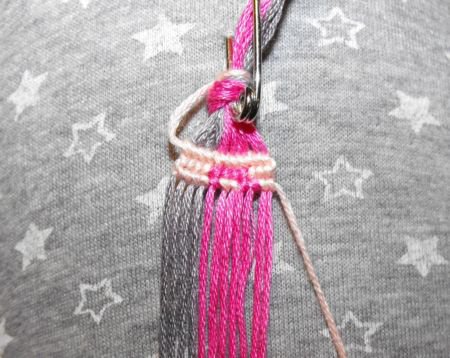
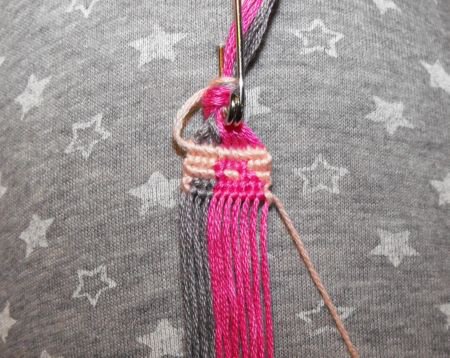
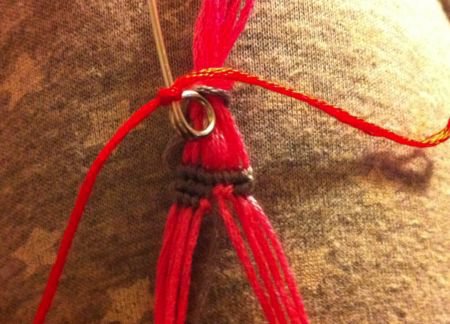
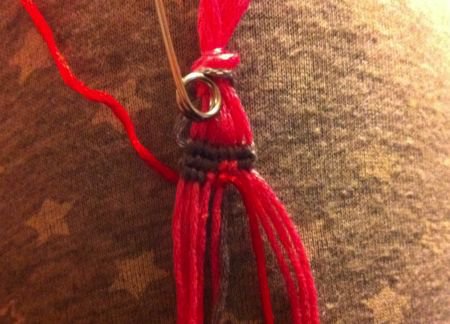
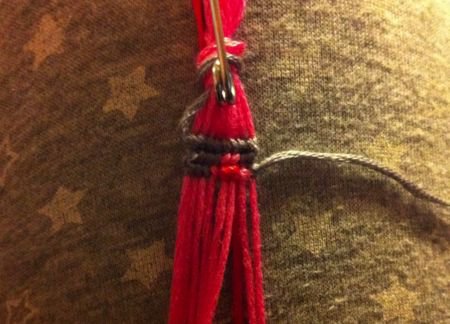
Step 5
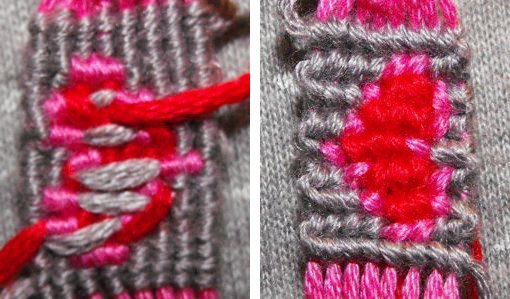
Take the red substituted string, and put it under all of the strings you already used for knots, this means it should be under 4 strings, and coming up so it's over the fifth gray string. It has to be on the top of the gray string, so it holds the bracelet together, and doesn't look messy. Do this exactly as shown in the picture.
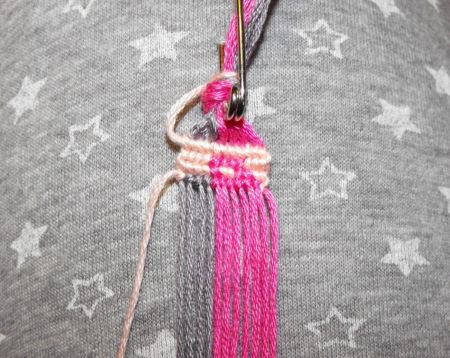
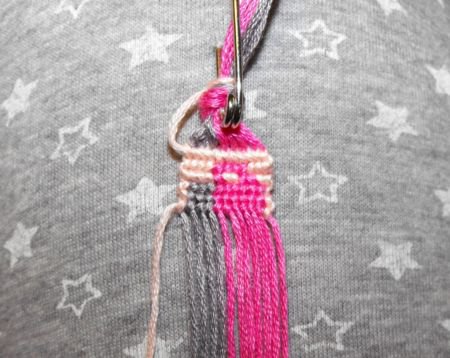
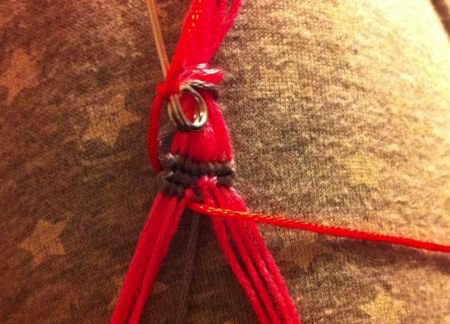
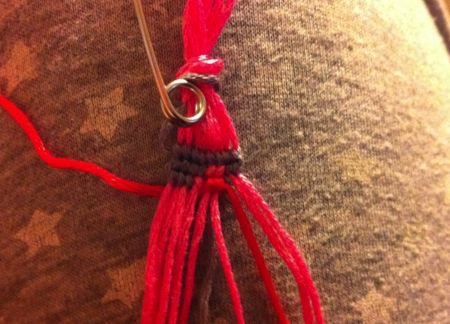
Step 6
Now take the red string and make two half-knots (a knot is basically two half-knots) as shown in the picture.
Step 7
Now fasten the knot. This is how the first substituted knot should look.
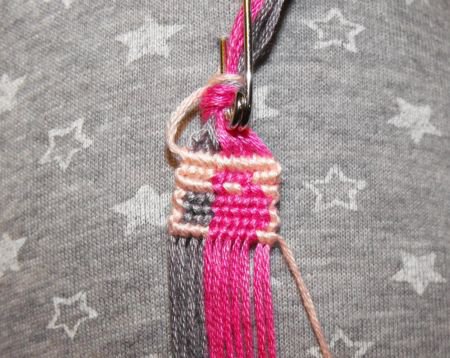
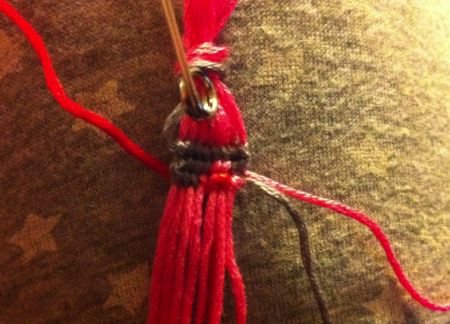
Step 8
Now make the second red knot. Do this normally as you would if it was your background string. At this point the gray background string is just hanging from the back of your bracelet. Don't worry about that, in the next step you're going to be using the gray string again.
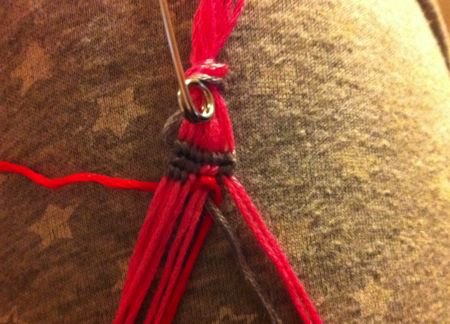
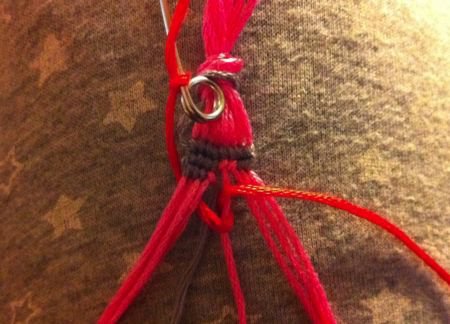
Step 9
Now this might sound a little bit confusing to some of you, so have a good look at the picture. What you need to do, is take the gray string, which is now the base of the fourth knot in this row, and put it under the two pink strings, and then it needs to come up over the red string. By doing this, you are making sure that the bracelet will hold together properly and won't have any gaps.

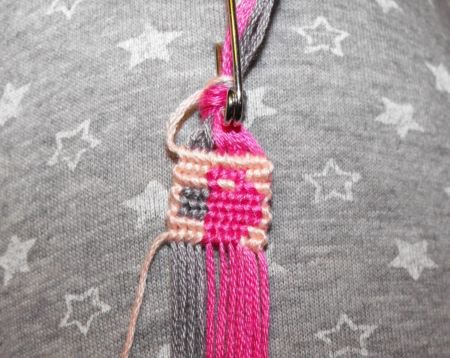
Step 10
Now take the next pink string and make two backward half-knots over the gray string as shown in the picture.
Step 11
Now fasten it. This is how your bracelet should look by now.
Step 12
Take the gray string and make the last knot over the pink string. This row is now finished.
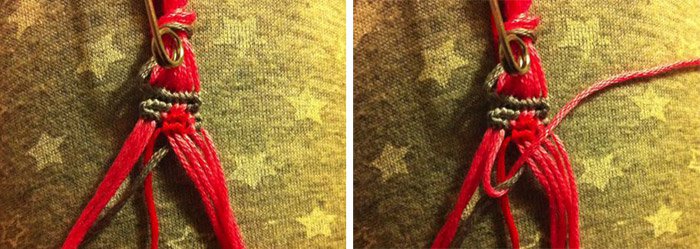
Step 13
Now make your fourth row. If you are still confused of how to place the strings when changing the strings, then these two pictures should help.
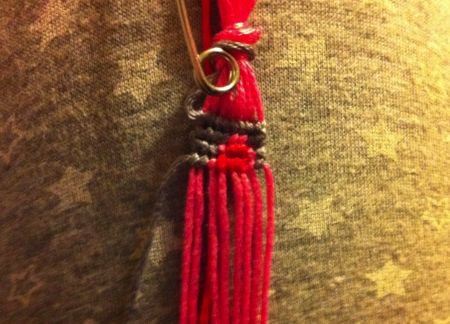
Step 14
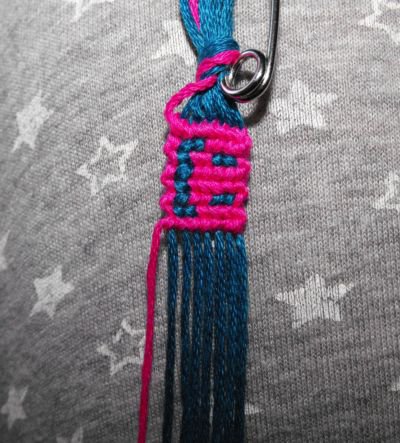
This is how the bracelet should look once you've finished the fourth row.
Step 15
Now continue tying the bracelet from the pattern #564 or the picture on the top of this tutorial. Use the same technique as I described in all these steps. If you get stuck, look on some of the pictures above.
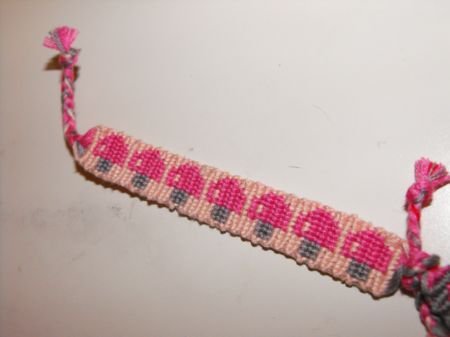
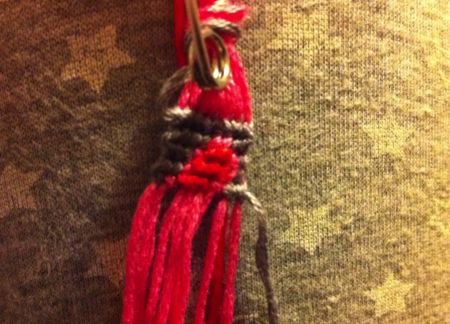
One Heart Finished
This is a detailed picture of one heart and its back after it's finished, make these hearts until the bracelet is long enough.
Changing the background color
In this tutorial we're going to be changing the background color, I used pattern #642. I changed it a little bit to fit with this tutorial.

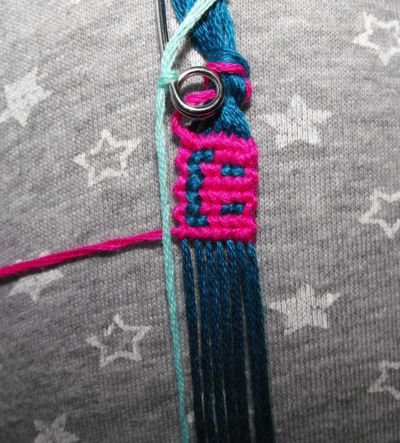
Step 1
Start making the bracelet as you would with simple alpha pattern, make the first row with pink string.
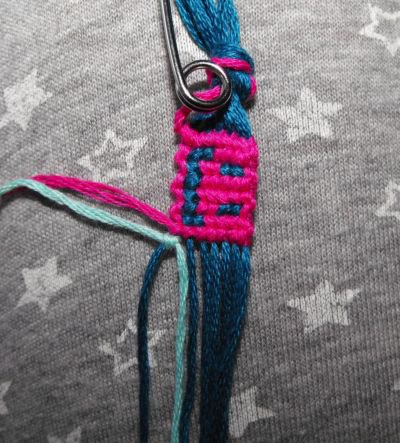
Step 2
This is how the second row should look.
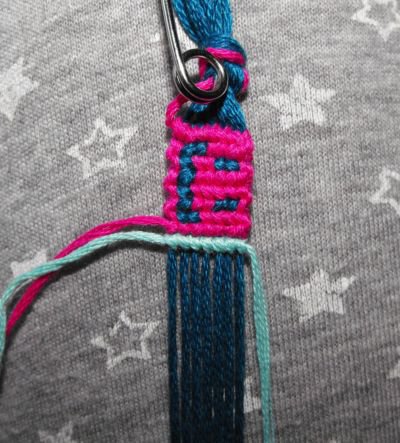
Step 3
This is how the bracelet should look once you finished the first section. Now we are going to substitute the other background color.
Step 4
Tie the string in somewhere, I usually tie it to my safety pin, but you can do it as you wish.
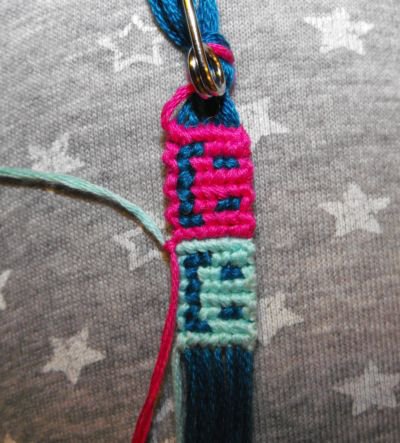
Step 5
This is the first knot with our substituted string.
Step 6
This is the whole row, all that we've done is simply use a new string. Take the two strings that are on the left, and tie them together with a simple forward knot. You can use glue on that knot so you can cut it off straight next to the knot, or cut it a little bit further so it doesn't loosen.
Finished bracelet
This is how the bracelet should look once you've done both colors, now continue tying from the pattern until the bracelet is long enough.